

User guide
Patreon Mass Scheduler User Guide
Install the Chrome extension, set up your schedule and mass schedule chapters, step by step with screenshots and videos.
- InstallAdd the extension from the Chrome Web Store.
- Sign inEnter your email and the code we send you.
- Set your release planChoose the first date and the chapters for each weekday.
- ScheduleAdd your chapters, tick your tiers and start the run.
Video guide
Install from the Chrome Web Store
Use Chrome on a desktop computer. You also need to be logged in to Patreon with a creator account that can make posts.
- Open the official Patreon Mass Scheduler listing in the Chrome Web Store.
- Select Add to Chrome, review Chrome's permission prompt, and choose Add extension.
- Open Chrome's Extensions menu and pin Patreon Mass Scheduler so its icon is always one click away.
The extension is distributed only through the Chrome Web Store.
Your privacy: what stays on your computer
- Everything runs inside Chrome on your computer. The extension works right in the Patreon post editor you already use, just as you would by hand.
- No login needed: there is nothing to connect, and you never give us your Patreon login or password.
- Your chapters and project settings are saved in Chrome on this computer. When you start a run, each post goes straight from your browser to Patreon. It never passes through our servers.
- No diagnostics, no crash reports, no analytics and no trackers.
- Polar handles payments, so we never see your card.
- Export a backup if you change computers or browsers, because your chapters are not stored online (see Back up and restore your projects).
Removing the extension or clearing its data deletes the chapters saved in Chrome. Posts already scheduled stay scheduled on Patreon.
Open the scheduler in the post editor
- On Patreon, start a new post and open its editor. Use a fresh draft: a post that is already scheduled or published cannot be used.
- In the post settings on the right, find the Patreon Mass Scheduler card and choose Open scheduler.
- The scheduler opens as one window on top of the editor. The list on the left jumps to each section: Account, Project, Chapters, Audience, Titles, Release plan, Launch burst, Safety pause and This run.
- The top of the window shows the project in use and your plan. Refresh loads your tiers and collections from Patreon again, for example after you add a tier.
- The bottom of the window shows what the run will do, with Save project and the Schedule button.
- Close the window with the X at the top right. Your project stays saved.

The same project settings are also in the extension's own window (click the extension icon). A change in either place is saved to the project.
Sign in and start your free trial
- In the scheduler, look at Account and access at the top. If it says Sign in to schedule, choose Sign in. The extension's account page opens in a new tab, so you never type a code or password on Patreon.
- Enter your email and choose Send code. Enter the six-digit code from your inbox and choose Verify and sign in. There is no password.
- The code works for 10 minutes. If it does not arrive, check your spam folder, then choose Resend code once its countdown ends.
- Choose Start trial or subscription. The website account page opens already signed in. Start the free trial there: it lets you schedule up to 20 chapters per run, 60 chapters in total (for example 3 runs of 20). Subscribe to schedule up to 500 chapters per run.
- Go back to the Patreon tab. Account and access now shows Free trial active or Scheduling access active, with the chapters your next run can schedule. If it has not changed, choose the round arrow button beside Manage account.
- Manage account opens the account page again, with your plan, Manage billing and Sign out.


Your Patreon login is separate: the email code signs you in to your scheduler account, not to Patreon. Use the same email on this website so both show the same plan. A chapter counts once, however many tiers it is posted to.
Create a project and set its release plan
A project is one story: its saved chapters, tiers, title rules and release plan. Make one project per story.
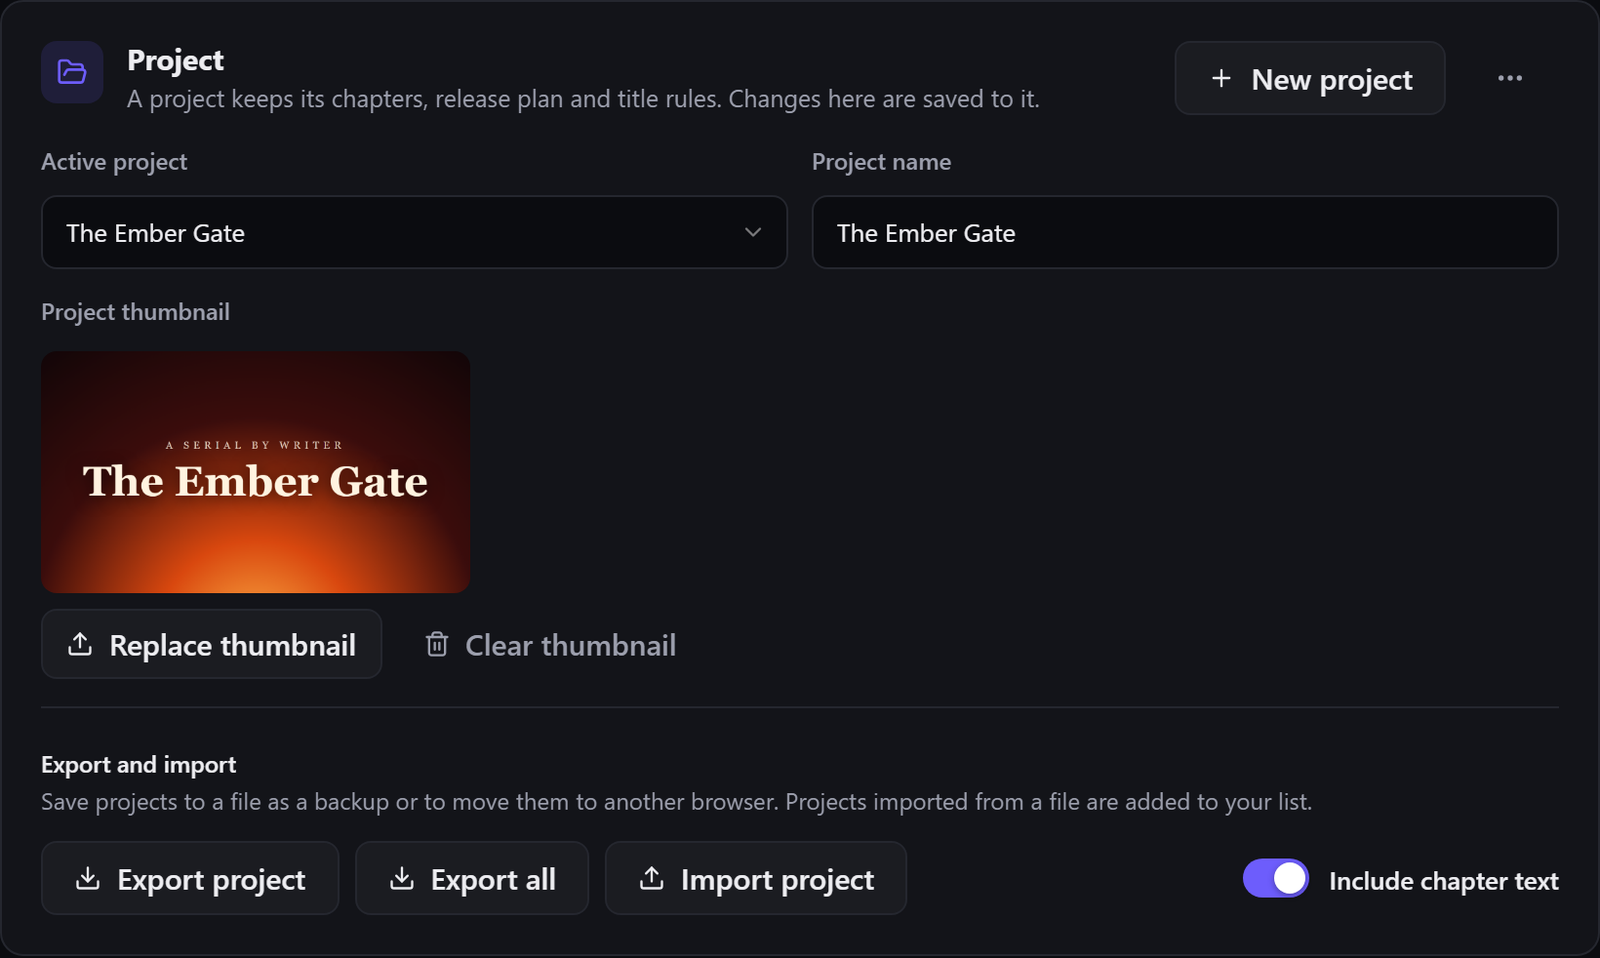
- Under Project, choose New project. Type a Project name you will recognise, for example your story's title.
- Optional: choose Upload thumbnail to give every post of this project the same preview image. Replace thumbnail and Clear thumbnail change or remove it.
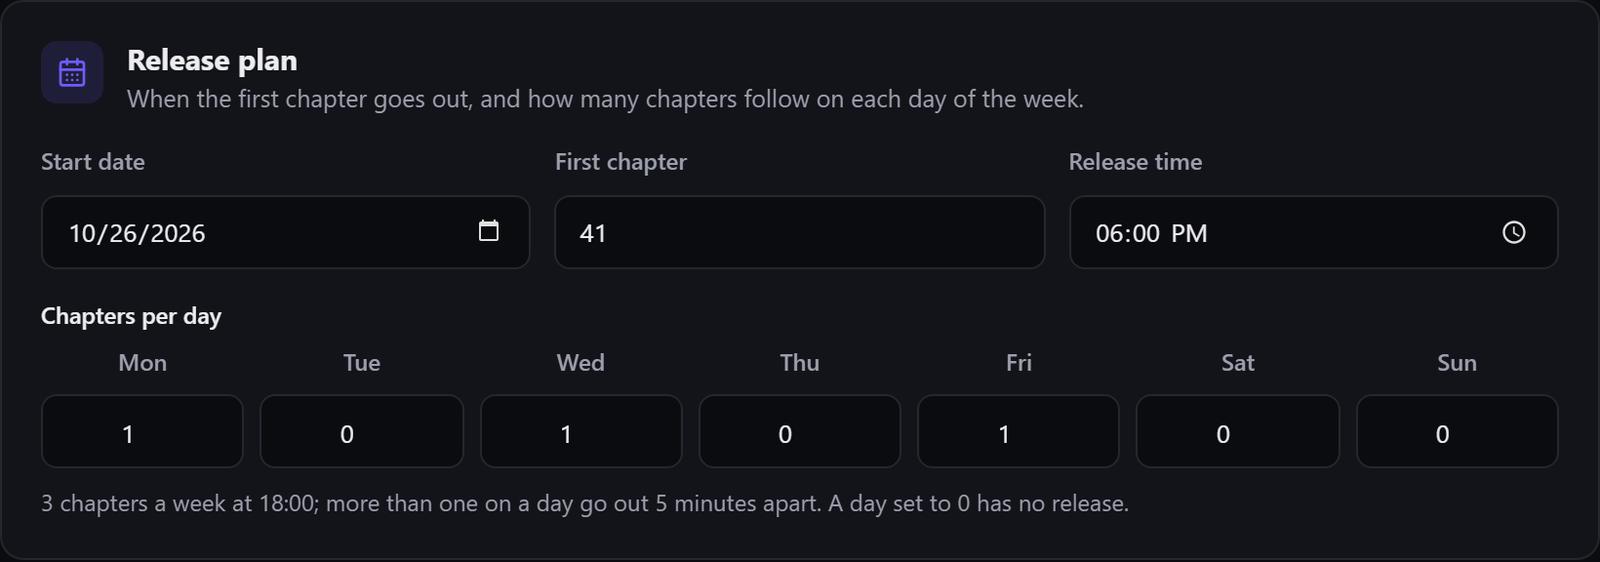
- Under Release plan, set Start date to the first release day, Start from chapter to the number of the chapter the schedule starts from, and Release time to the time posts go live, in your computer's time zone.
- Under Chapters per day, set how many chapters go live on each day from Mon to Sun. Use 0 for days without a release. When a day has more than one chapter, they go out 5 minutes apart, in order.
- Choose Save project at the bottom of the window. Unsaved changes is shown there until you do; the Schedule button also saves first.
- Active project
- The project this run uses. Pick another story here to switch to its chapters and settings.
- Start from chapter
- The first chapter number the next run schedules. Chapters before it are left alone.
- Release time
- The release time in your own time zone. Patreon shows the same moment to each patron in their time zone.
- Delete project
- In the three-dot menu beside New project. It removes the project with its saved chapters and thumbnail from this browser, and asks first. Posts on Patreon are not changed.
To post a single draft to several tiers without saved chapters, choose No project (this draft only) under Active project. Then each ticked tier gets its own date and time under Audience.
Use a launch burst
- Under Launch burst, turn on Use launch burst to release more chapters on the first days, for example when you launch a story or a new arc.
- Set Burst days. Each day then has its own row: how many Chapters, and the Time of the first one. The rest follow 5 minutes apart, in chapter order.
- Each day shows its release times in words under the row. A day set to 0 has no release.
- After the last burst day the weekly release plan continues; the text under the list names the day and time it starts.

Set the safety pause
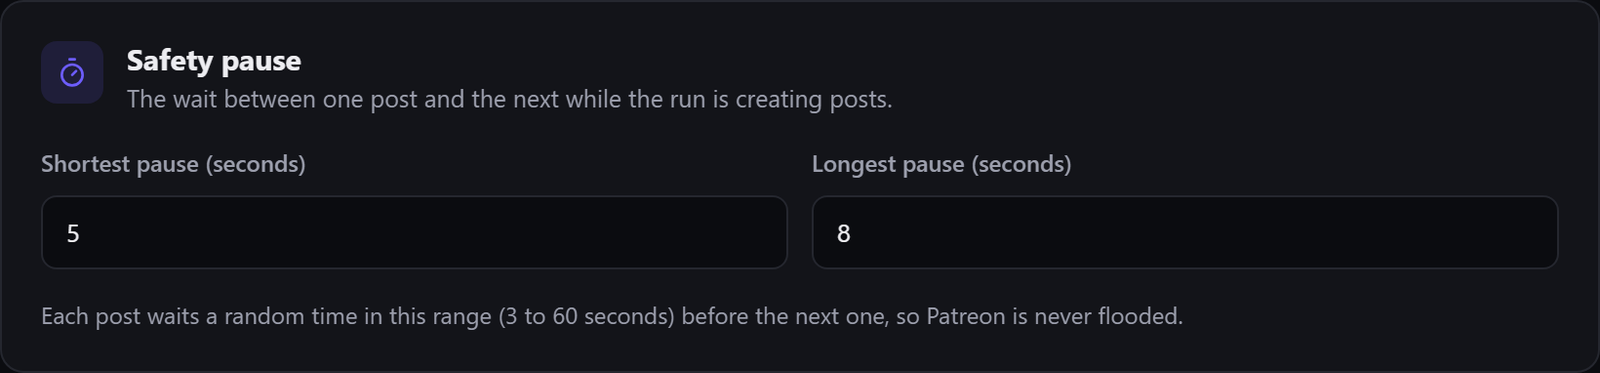
- Under Safety pause, set Shortest pause (seconds) and Longest pause (seconds), each from 3 to 60.
- During a run, every post waits a random time between the two before the next one is created, so a long run does not send everything at once.
- A longer pause makes a run slower and gentler. It does not change when the posts go live.
Save your chapters
- Under Chapters, choose Upload chapters to add .docx, .txt, .md or .html files, or Paste chapters to paste from Word, Google Docs or any text. Bold and italics are kept.
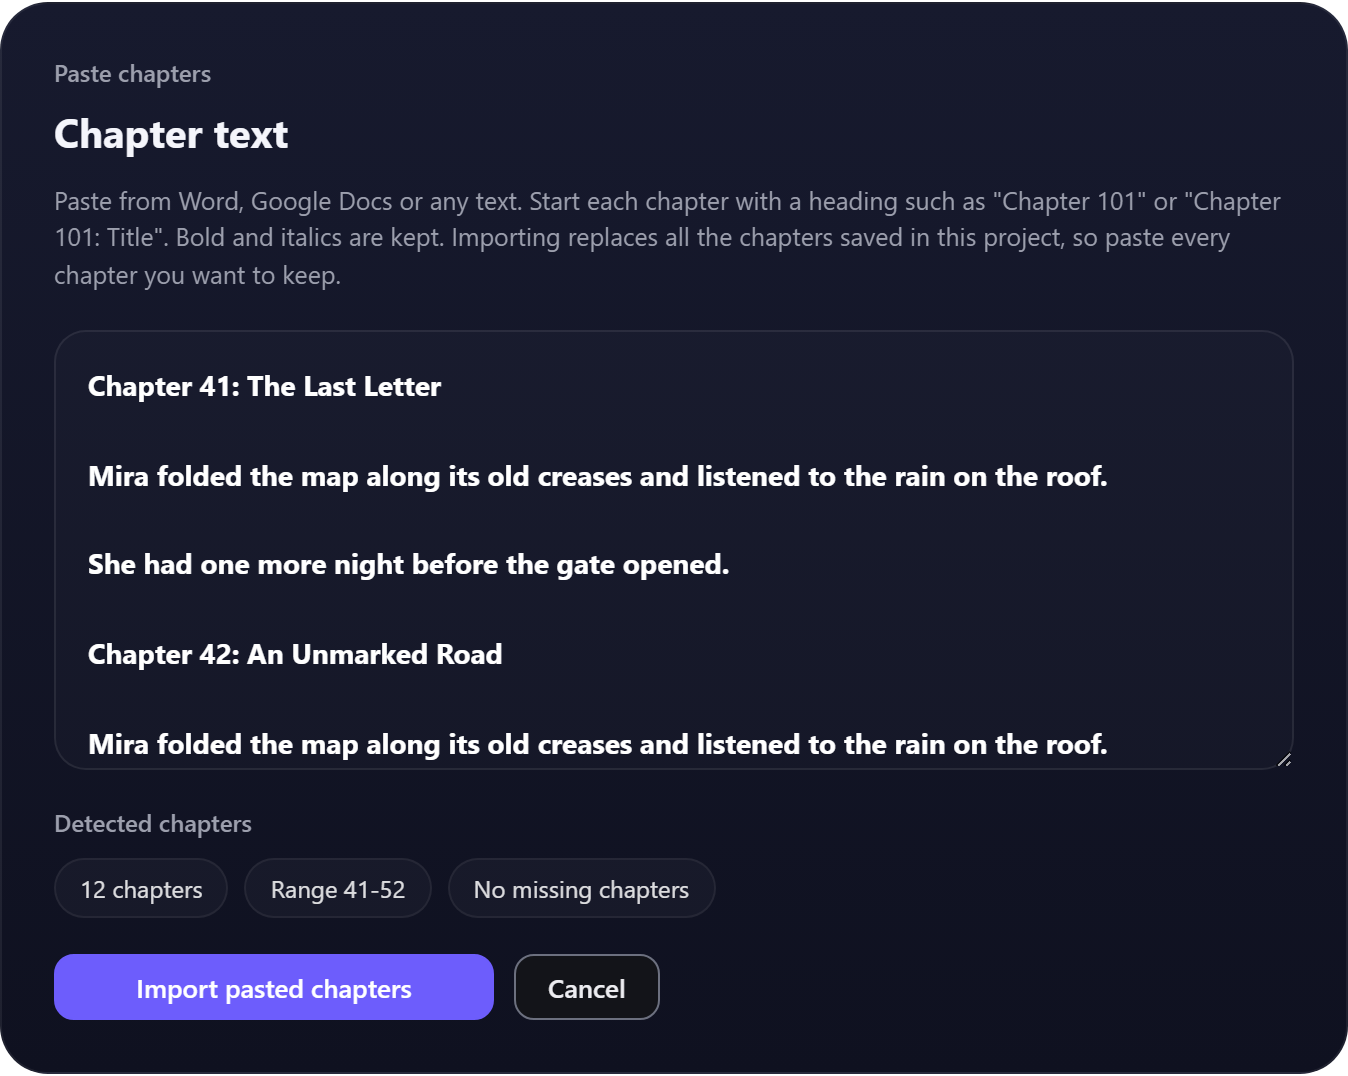
- Start every chapter with a line such as Chapter 41 or Chapter 41: The Title. That line becomes the post title; the text below it becomes the post.
- In the paste window, Detected chapters shows how many chapters were found, their range and any missing numbers as you paste. Choose Import pasted chapters.
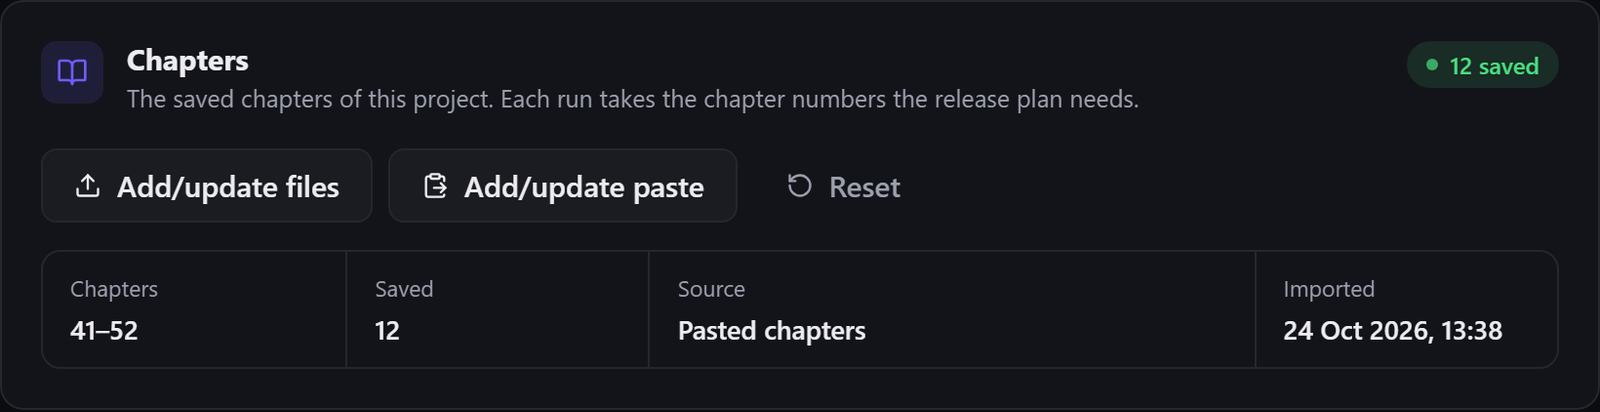
- The Chapters section then shows the saved range, how many chapters are saved, the source and when they were imported.
- To change the saved chapters later, choose Add/update files or Add/update paste. An import replaces the chapters saved in the project, so include every chapter you want to keep.
- Reset removes every saved chapter from the project. It asks first.
Chapter 41: The Last Letter
The text of chapter forty-one...

Chapter 42: An Unmarked Road
The text of chapter forty-two...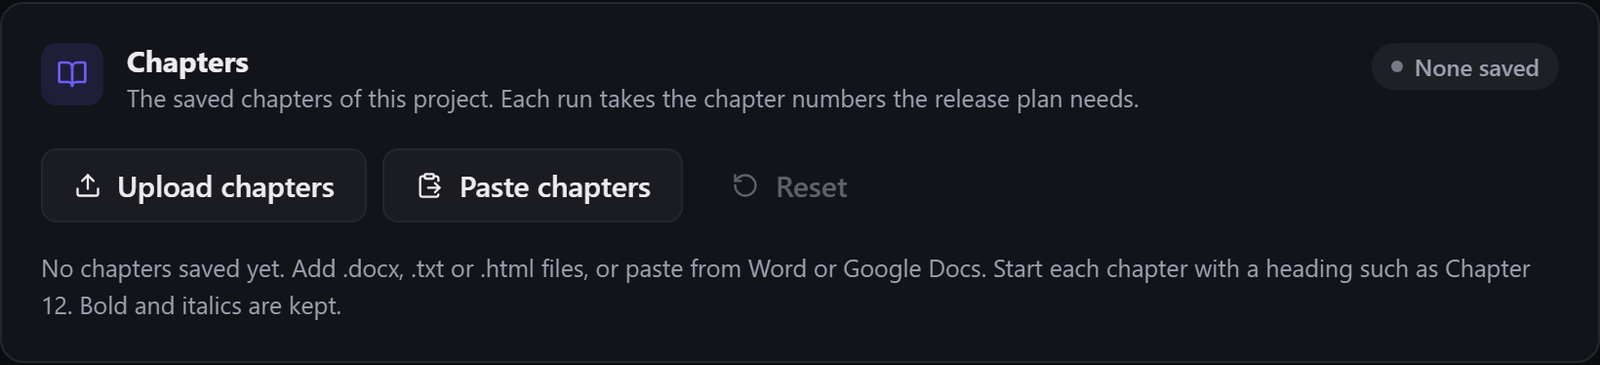
Chapters stay on your computer; they are sent only to Patreon when you schedule them.
Choose tiers and the collection
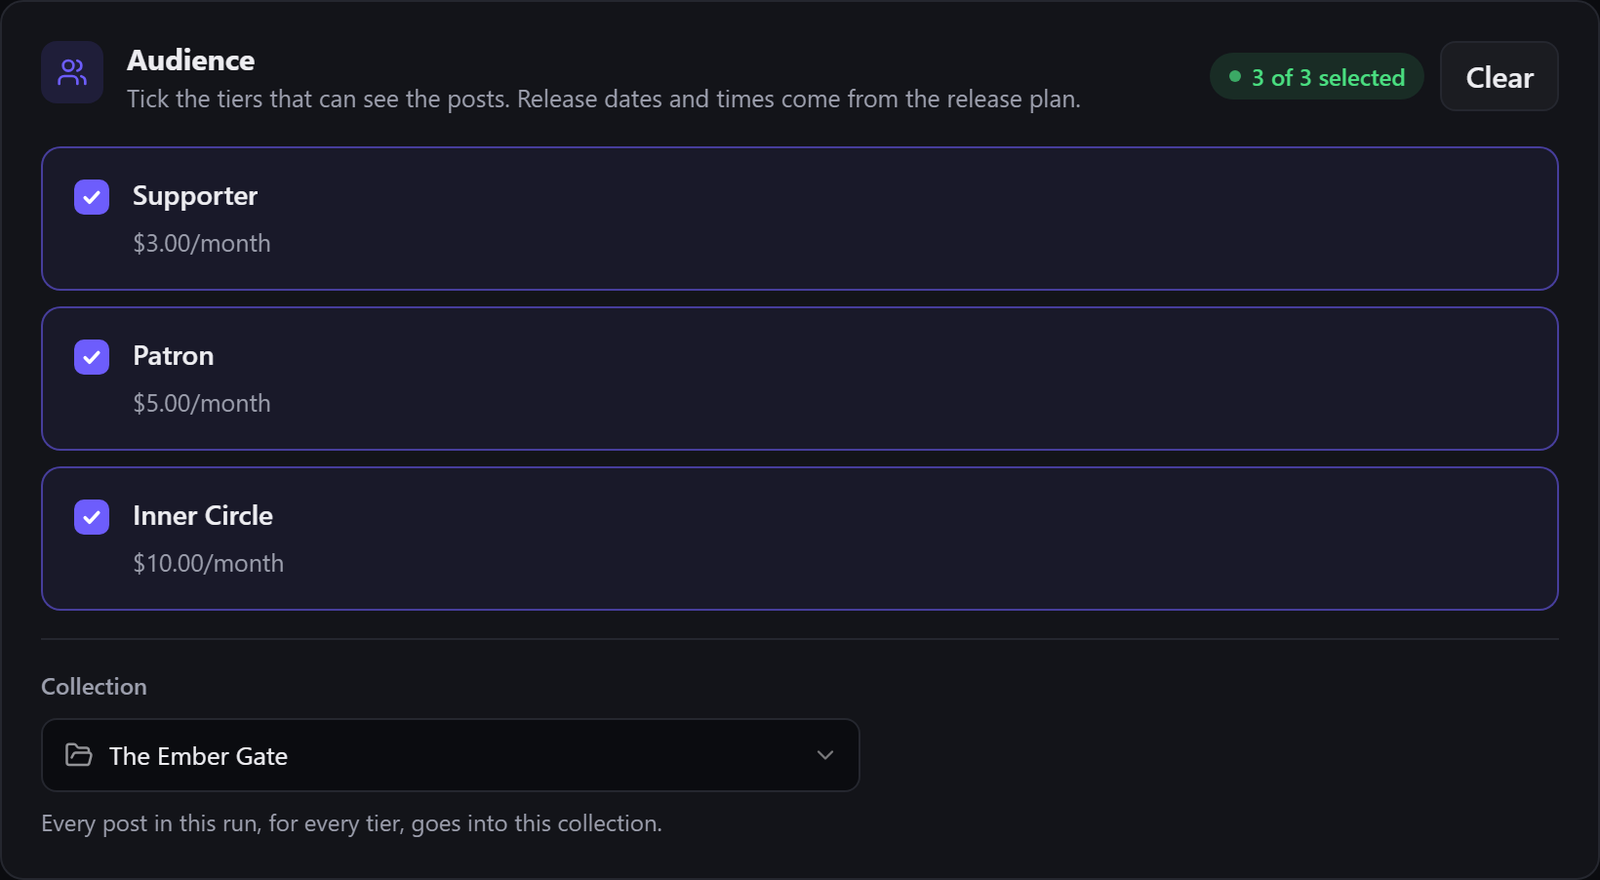
- Under Audience, tick every tier that should see the posts. Select all ticks them all, and Clear unticks them.
- Each chapter becomes one post that every ticked tier can see.
- Under Collection, pick the collection every post of the run goes into, or No collection.
- If a tier or collection you just made on Patreon is missing, choose Refresh at the top of the window.
- Choose Save project to keep the tiers and the collection with the project.
Set the post titles
- Each post title starts from the chapter heading in your saved chapters, for example Chapter 41.
- Under Post titles, turn Add collection name on or off to put the collection name in every title, for example The Ember Gate Chapter 41.
- Turn Add tier names on to add the names of the ticked tiers.
- Type a Title prefix or Title suffix if every post should carry the same words.
- Example title shows the result for the first chapter before you schedule anything.

Choose how many chapters to schedule
- Under This run, set Chapters in this run. The run starts at Start from chapter in the release plan and takes that many chapters.
- Saved chapters, Posts and Burst posts show what the run contains. The line below gives the first and last chapter with their dates and times.
- Check the release times listed for the first chapters. Launch burst posts are marked Burst.
- If a chapter number in the range is not saved, the section names it. Save that chapter first, or change Start from chapter or the number of chapters.
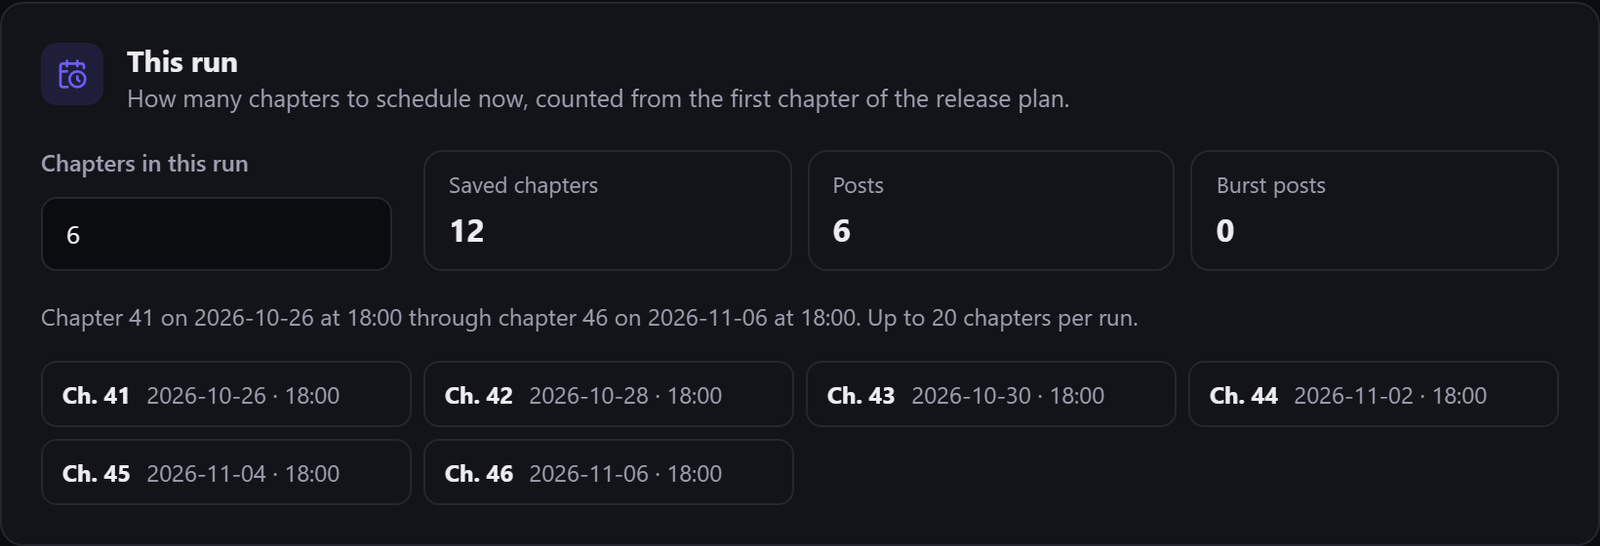
During the free trial a run can schedule up to 20 chapters, and Chapters in this run stays within what your subscription allows.
Start scheduling and follow progress
- Read the line at the bottom left of the window, for example 6 chapters to 3 tiers, one post per chapter. If something is missing, it says what, for example Select at least one tier.
- Choose the Schedule button at the bottom right, for example Schedule 6 posts. Unsaved changes are saved first. The first chapter is filled into the draft and the window closes.
- Press Patreon's own Schedule button in the post editor. Nothing is sent before you do.
- The progress window opens. The first post is saved, then the rest are created and scheduled one at a time. Completed and Remaining count the posts.
- Keep the Patreon tab open until the run finishes. Stop run ends the run; it does not undo posts already scheduled.
- When the run finishes, Post Results lists every post with its date, time and a link to it on Patreon. Close closes the window; Clear run also removes these results, and asks first.



A post that is already scheduled on Patreon with the same title and time is not scheduled again, so no chapter goes out twice.
If a post fails or a run stops
- Read the reason beside each post in Post Results, and choose Warnings and errors to see only the problems.
- If a post failed after its draft was created, the results list the draft ID with a Copy draft IDs button. Review or delete that draft on Patreon before you run the chapter again.
- A run stops at the first post that fails. The later posts are not sent, so no chapter goes out before the one that failed.
- To schedule what is left, open a fresh draft, set Start from chapter to the first chapter that did not go through, and run again.
- Choose Copy log if you contact support.
Only one run per project can be active at a time. Finish or stop a run in another Patreon tab before you start the next.
Back up and restore your projects
- Under Project, find Export and import. Leave Include chapter text on to save the chapters in the file, or turn it off to save the settings only.
- Choose Export project for the active project, or Export all for every project. The file is saved to your downloads.
- To restore a backup or move to another computer, choose Import project and pick the file. Import from file shows which projects the file holds.
- Under If a project already exists, choose Keep both (adds a copy), Replace, or Skip. Turn Import chapter text off to bring in the settings only.
- Choose Import. You can import the same file again at any time.

Keep a backup before major changes. Your chapters are saved only in Chrome on this computer.
Troubleshooting
- No scheduler card in the post editor
- Turn on the extension in its own window (click the extension icon), open the editor of a new post, and reload the page.
- This post is already scheduled or published
- Open a fresh draft. The scheduler only works on a new post.
- Sign in to schedule
- In the scheduler, choose Sign in under Account and access, sign in on the account page, then return to the Patreon tab.
- A trial or subscription is needed
- Choose Start trial or subscription, start the free trial or a subscription on the website, then return to the Patreon tab.
- Your free trial chapters are used up
- Subscribe to schedule up to 500 chapters per run.
- No membership tiers loaded yet
- Choose Retry Tier Detection, or Refresh at the top of the window. Check that your Patreon page has paid tiers and that the post is a new draft.
- The first release time has already passed
- Move Start date or Release time forward under Release plan, then schedule again.
- A chapter is not in your saved chapters
- Save the missing chapter under Chapters, or change Start from chapter or Chapters in this run so the run only covers saved chapters.
- Your Patreon session expired
- Log in to Patreon again in the same browser, open a fresh draft and run the remaining chapters.
- Update the extension
- Close and reopen Chrome to get the newest version, then open the post editor again.
- Website and extension show different plans
- Check that both use the same email, then choose Refresh account on the extension's account page.
- "Cannot connect to your account"
- Install the extension from the Chrome Web Store link on this website, then sign in again. If the message stays, contact support.
For support, include the extension version, the affected chapter numbers and the copied log. Never share one-time codes or your chapter files.
No matching steps. Try a different setting or chapter action.